Our Blog: September 8, 2023
- 877.861.5078
- Schedule a Tour
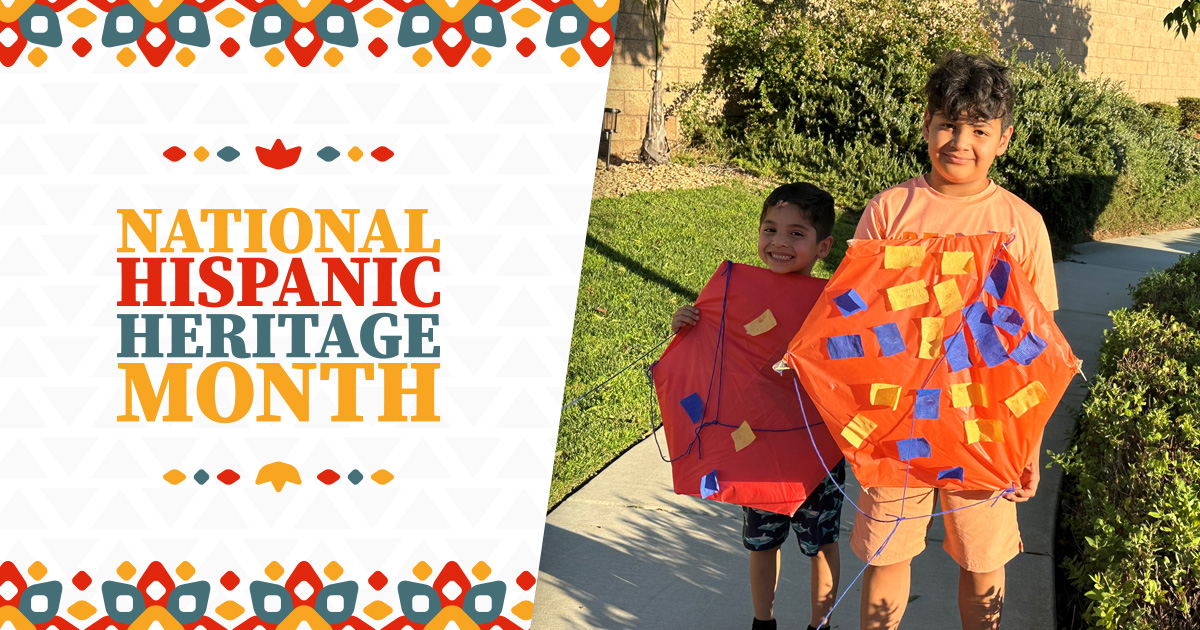
Hello! ¡Hola! We’re excited to share multiple ways for you and your family to learn about and explore the beautiful diversity represented by National Hispanic Heritage Month.
It’s celebrated in the United States annually from September 15 to October 15 to recognize the lasting influences and contributions of Hispanic Americans throughout our nation’s history.
We’ll be cooking, reading, and crafting together to give you a hands-on way to experience multiple layers of some of the rich cultures, dynamics, and traditions that bind families and communities together.
✔ Try Recipes Inspired by Hispanic Flavors
✔ Explore Book Recommendations by Age
✔ Create a Colorful Día de los Muertos Kite
Click on each topic above to jump to the perfect spot in this article to explore your interests.
We hope you’ll designate time with your child to discover something new, whether it’s a flavorful recipe, meaningful story, or creative outlet. Have fun! ¡Diviértanse!
Try Recipes Inspired by Hispanic Flavors
We’re sharing two Grow Fit-approved recipes served to children in our schools. They’re healthy and hearty, plus inspired by traditional Latin American flavors. You’ll use salsa, refried beans (a staple of Mexican and Tex-Mex cuisine), and tortillas which are popular in both Mexican and Spanish cultures.
Beany Enchilada Casserole, Serves 4-6
In some regions, seasonal changes are taking place as we shift from summer to fall. If you live in a state that experiences a cool down, this often goes hand-in-hand with the return of cozy, comfort foods like casseroles that require using the oven. Warm kitchens, warm bellies!
*Did you know? The origin of enchiladas is traced back to the Aztec civilization on the Yucatan peninsula. Nowadays, the rolled tortillas come with all sorts of fillings and are smothered in a variety of sauces.
Grab these things:
- 1 can refried beans
- 1 can black beans, drained
- 1 cup any cheese, shredded
- 6 whole wheat tortillas
- 1 can enchilada sauce
- 1 sweet pepper, diced
Let’s get cooking:
- Preheat oven to 350 degrees Fahrenheit (325 for convection ovens).
- Pour half the enchilada sauce into the bottom of a large baking dish. Tilt to coat.
- Place three tortillas on top of the sauce. Spread half the refried beans over top.
- Combine the remaining enchilada sauce with the peppers and black beans. Spread half of the mixture over the refried beans.
- Sprinkle with ½ cup of cheese.
- Repeat steps 3 to 5 to add another layer of tortillas, refried beans, pepper mixture, and cheese.
- Bake for 35 minutes. Let stand 5 minutes before cutting and serving.
Baja Black Bean & Rice Bowl, Serves 4
When you’re short on time, this quick and satisfying meal is a great way to switch up Taco Tuesday! It’s easy and delicious. Plus, it’ll be on the table within minutes.
*Did you know? Baja refers to the narrow, Western peninsula of Mexico south of California. The coastal region is best known for its fresh seafood and fusion of bold flavors. (Fish tacos, anyone?)
Grab these things:
- 1 lb. brown rice, dry
- 1 can black beans, drained
- ½ lb. shredded cheese
- 1-2 cups corn, drained or cut fresh off the cob
- 1 cup salsa
- Salt and pepper, to taste
Let’s get cooking:
- Prepare brown rice according to package directions.
- Heat the corn and beans separately, using your method of choice.
- Serve family-style to encourage guests of all ages to build their own Baja Bowls by layering the ingredients together. Season with salt and pepper, to taste.
Optional: Finish with a dollop of low-fat sour cream and/or a sprinkle of scallions.
Explore Book Recommendations by Age
What better way to celebrate Latino culture than through rich storytelling! We’re sharing a dozen education-approved book recommendations by age so you and your family can learn about the traditions, language, and family dynamics of Hispanic influences.
Toddlers
- Dia de Los Muertos by Roseanne Greenfield Thong
- Green Is a Chile Pepper A Book of Colors by Roseanne Greenfield Thong
- Little Chickies/Los Pollitos Bilingual Nursey Rhymes by Susie Jaramillo
Preschool/Pre-K
- Alma and How She Got Her Name by Juana Martinez-Neal
- Paletero Man by Lucky Diaz
- Maybe Something Beautiful: How Art Transformed a Neighborhood by F. Isabel Campoy and Theresa Howell
School Age (6 to 9)
- Gathering the Sun: An Alphabet In Spanish and English by Alma Flor Ada
- The Rainbow Tulip by Pat Mora
- Harvesting Hope: The Story of Cesar Chavez by Kathleen Krull
School Age (9 to 12)
- The Three Golden Oranges by Alma Flor Ada
- Pablo Remembers by George Ancona
- My Name is Gabito: The Life of Gabriel Garcia Marquez by Monica Brown
Reading along? Snap a picture and tag us on social media.
We also have a bonus book selection to share that pairs perfectly with our craft below. Flip through the pages of Barrilete: A Kite for the Day of the Dead and then create one of your own!
Create a Colorful Día de los Muertos Kite
Día de los Muertos means Day of the Dead in English. The multi-day Latino holiday involves family members and friends gathering to remember loved ones who have passed on. The colorful festival honors the legacy of past generations and runs from October 31 to November 2.
You might be familiar with Disney’s Pixar movie Coco. It depicts Día de los Muertos celebrations through the eyes of a curious young boy and his family’s experience. At the core of the story and festival alike, is the belief that the more you talk about your ancestors, the more their memory says alive.
In Guatemala, the country is known for holding a Barriletes Gigantes festival to mark the occasion. It directly translates to “giant kite.” The massive, intricate kites take months to create and are then flown over the gravesites of family members to turn the somber landscape into a sea of cheerful colors that lift their spirits. We’re going to show you how to make your own!
Watch this video from our sweet friends and brothers, Julian (10) and Josiah (5), as they create kites to show us how it’s done. Their mother, Belem Hernandez Melendez, is an Operations Analyst for Learning Care Group and proudly volunteered to share their crafting experience with us.
You’ll need these supplies:
- Yarn or string
- Plastic table cover
- 12” sticks or skewers
- Scotch tape
- Glue stick
- Scissors
- Tissue paper
Shop at the dollar store or gather crafting and wrapping supplies at home. Remember, you’ll want your kite to be as vibrant as possible. The more variation you have in colors or patterns, the better!
Ready to get started?
- Begin by making a six-sided hexagon. This will be the shape of your kite. You’ll use 12 sticks total. It will resemble a wheel. Reference the picture below while building your frame:
A. To make the middle spokes, lay two sticks end-to-end and tape them together in the middle. Do these twice more so you have three extra-long sticks. Now, overlap them and secure the center where they all crisscross with more tape.
B. Add six more sticks to connect the outer edge between each point. Use the tape to secure them all together and stabilize your frame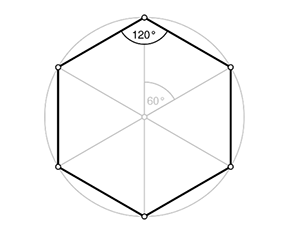
- Spread the table cover out. Place your frame on top. Wrap it around the edges completely covering the frame. Cut off any excess so you don’t weigh it down. The lighter it is, the higher it might fly. Tape it on securely.
- Cut or tear pieces of tissue paper to decorate the front of your kite. Use a glue stick to attach them. Experiment with different colors, irregular shapes, or patterns.
- It’s time to attach the yarn or string. Poke small holes in three corners (think of a triangle) so they’re evenly spaced. Tie your yarn to each one letting it stretch out to meet in the middle. Join them together and tie it tightly. Leave yourself a long tail for holding it up outside.
Now, for the fun part! Take your kite outside and see if you can get it to fly!
A breezy day will work best, of course. And remember, no matter what, art is such a beautiful, engaging way to learn about traditions and, in this case, to connect with generations—past, present, and future.
We hope you’ve enjoyed the activities, books, and recipes we’ve shared for National Hispanic Heritage Month. Our goal is to inspire you to connect with others, get involved, and learn something new.
Share this article to encourage your friends and family to do the same. Thank you! ¡Gracias!